วันอังคารที่ 3 กันยายน พ.ศ. 2556

How is DVD Made?

  เขาทำแผ่นดีวีดีกันอย่างไร?


                          Teacher  Phaitoon  Yaemprasuan    

    Source   http://bigpigture.ru

Фотограф Андрей Мануйлов был уверен, что информация на любой диск всегда записывается. Как оказалось, нет....
Photographer Andrew Manuilov was sure that the information on any disk is always recorded. As it turned out, no. Once on the only one in Kazakhstan plant optical media LaserMaster, he learned that the information in the wheels literally imprinted. But see for yourself 

ภาพที่เห็นนี้ เป็นการผลิตแผ่นดีวีดีของโรงงานในประเทศคาซัคสถาน (ตั้งอยู่ในเอเชียกลาง แถวทะเลแคสเปียน ทะเลปิดที่ใหญ่ที่สุดในโลก  คาซัคสถานประเทศนี้รวยน้ำมันและแก๊สธรรมชาติ  อยู่ติดกับประเทศจีน  อุซเบกิสถาน และประเทศรัสเซีย )

Производство компакт-дисков – процесс полностью автоматизированный, однако за ним наблюдает главный инженер завода Сергей Вотинцев

1. Production of a CD - the process is completely automated, but watching him chief engineer Sergei Votintsev
 ขบวนการผลิตเป็นระบบอัตโนมัติ 
  
Оптические диски делаются из поликарбоната, который поступает на завод в огромных мешках
2. Optical discs are made of polycarbonate, which is supplied to the plant in huge bags
 แผ่นอ็อปติคอล (หมายถึงอ่านด้วยแสง)  ทำมาจากสารโปลีคาร์บอเนต (เป็นสารที่ได้จากขบวนการปิโตรเคมี  จากก๊าซธรรมชาติ บ้านเราจะผลิตที่จังหวัดระยอง)  ซึ่งจะบรรจุถุงขนาดใหญ่มาให้โรงงาน
  
Вот это - будущие диски!
3. Here it is - the future drives!
 สารนี้เป็นเกร็ดเล็กๆ (granules)
  
Из мешков гранулы поступают сначала в устройство сушки…
4. Granules coming out of the bag into the first drying ...
เอาสารนี้ไปทำให้แห้ง 

  
после чего по трубам направляются в литьевую машину, где нагреваются до жидкого состояния…
5. after which the tubes are directed to an injection molding machine where heated to a liquid state ...
หลังจากนั้นก็เอาไปทำให้เหลวด้วยความร้อน  (heated to a liquid state)  แล้วจะส่งผ่านท่อไปยังเครื่องฉีดแบบ (injection molding machine) 

  
…и под давлением впрыскиваются в пресс-форму, в которой расположен стампер
6. ... And injected under pressure into a mold in which is stamper
 สารจะถูกฉีดภายใต้ความดัน ภายในแม่พิมพ์
  
Стампер - это металлическая пластина с точным изображением информации. Вот в этой штуке и...
7. Stamper - a metal plate with an accurate picture of the information. Here's the thing, and there is a film which then is transferred to the disk. We stamper is another name - the matrix. By the way, no one would have allowed you so simply take the matrix in hand - consider that it immediately end
 แม่พิมพ์
  
При температуре 250 градусов, нагретый до жидкого состояния поликарбонат, принимает форму диска. А информация, нанесенная...
8. At 250 degrees, heated to a liquid state polycarbonate takes the form of a disc. A message on the matrix printed on it
 สารโพลีคาร์บอเนตเหลว ณ อุณหภูมิ 250 องศา
  
Первые 30 заготовок каждого тиража автоматически забраковываются для обеспечения стабильности последующего литья
9. 

  
Заготовки с информацией поступают в охладительный узел, где их температура опускается до комнатной
10. The blanks with the information coming into the cooling unit, where its temperature is lowered to room
แผ่นเปล่ากำลังเคลื่อนสู่ส่วนที่ทำให้มันเย็นลง เท่ากับอุณหภูมิห้องปกตินั่นแหละ

  
Как делают DVD-диски?: фото №0011
11.


Как делают DVD-диски?: фото №0012
12.


Затем они покрываются отражающей поверхностью (металлизация), чтобы в дальнейшем луч лазера в вашем проигрывателе мог...
13. Then they are covered with a reflective surface (metallization) to further the laser in your CD player can read the information on the disk. Without this coating laser simply pass through
 จากนั้นก็จะเป็นการเคลือบผิวสะท้อนแสง (reflective surface)
  
Затем заготовки склеиваются между собой прозрачным клеем, который центрифугой разматывается по поверхности для равномерной склейки....
14. The preforms are glued together by a transparent adhesive, which is unwound by the centrifuge for a uniform bonding surface. DVD-discs made of two layers, a CD - one
 ส่วนผนึกกาวด้วยสารยึดเกาะชนิดใส (transparent adhesive)
  
Пока это полуготовая продукция
15. While this is a semi-products
อันนี้เพิ่งจะเสร็จไปแค่ครึ่งทางนะ ต้องไปผ่านกระบวนการต่อ

  
Производится тест поверхности диска лазером. Из 40 дисков машина забраковала один. Минимальная партия одного фильма...
16. Tested with laser
ต้องผ่านการเทสต์ด้วยเลเซอร์

  
После того как напечатали одну партию фильмов, ее отправляют на покраску. В это время можно...
17. After one batch of printed films, it is sent to the painting. At this time you can start another batch of movies
 ส่วนพิมพ์ฉลาก
  
За этим процессом следит Роман Гордеев, оператор принтера, задача которого – добиться точного соответствия...
18. During this process the next novel Gordeev, the operator of the printer, whose mission - to accurately simulate the customer received the label layout
เจ้าหน้าที่ก็ต้องทำทีเป็นลูกค้า พิจารณาดูฉลากของ DVD ว่าโอเคหรือเปล่า 

  
Готовые диски поступают на склад временного хранения, где все расположено в алфавитном порядке.
19. Finished discs come in a temporary warehouse, where everything is in alphabetical order.
 คลังเก็บ (warehouse)
  
Ирина, менеджер учета, готовит комплектации с заданием – диски и полиграфию для последующей сборки

Как делают DVD-диски?: фото №0021

Каждый диск сопровождается голограммой
22. Each disc is accompanied by a hologram
แต่ละแผ่นจะต้องผนึก hologram การันตีว่า  เฮ้ย...นี่ของแท้แน่นอน

  
Сначала в DVD-боксы вставляется полиграфия, затем диски. Девушки делают это с невероятной скоростью
23. First, a DVD-box printing is inserted, and then drives. Girls do it with incredible speed
นี่ล่ะงานถนัดของพนักงานหญิงเธอล่ะ... Packing & Labeling
  
Собранные диски попадают на станок, где упаковываются в целлофановую пленку

А уже потом собираются в коробки и отправляются на распределительный центр

Оттуда товар ежедневно расходится по магазинам всего Казахстана

Сейчас коробки отгружаются в магазин «Меломан Гранд», расположенный по улице Гоголя в Алматы

На всех этапах производится тщательный контроль за сохранностью всех объектов интеллектуальной собственности от возможной утечки...
28. At all stages, made a careful control of the safety of all intellectual property from possible leaks
ทุกขั้นตอน ต้องทำการการควบคุมแบบเข้มงวด กับความปลอดภัยของทรัพย์สินทางปัญญา (intellectual property) เผื่อว่าอาจจะมีการรั่วไหลขึ้นได้ไง (possible leaks)
  
И наконец, готовый товар на прилавках ждет своих покупателей
29. And finally, the finished product on the shelves waiting for their customers
บั้นปลายท้ายสุด.. ผลผลิตของพวกเขาก็จะถูกนำไปวางโชว์ลูกค้าอยู่ในร้านจำหน่ายดีวีดี

สังเกตดูให้ดีจะเห็นว่า ประเทศคาซัคสถานสื่อสารด้วยภาษารัสเซียน  ก็ในปี 1991 ประเทศนี้พร้อมกับอีก 15 ประเทศ  ตกลงแยกตัวออกมาจากสหภาพโซเวียต (ซึ่งก็คือรัสเซียนั่นแหละ) ภายหลังการล่มสลายของระบอบคอมมิวนิสต์  
Приятного просмотра!
30. Enjoy!  ขอให้สนุกทุกๆ คน

วันอังคารที่ 27 สิงหาคม พ.ศ. 2556


What/How About Our Home Network is?

by  Teacher  Phaitoon  Yaemprasuan  :  occupatech@gmail.com
                                   http://picta55.blogspot.com 
 

I have known from students of my computer classes that the Internet connection at their homes is of TOT provider. Yes, my internet service provider (ISP) is TOT too. What/how is my home network?  The modem-router is the main device of the network because it plays many roles as of the followings : -
   1) to simulate itself like a server computer
   2) to act as a hub/switch of the wired connection
   3) to be an access point sending packets of the wireless connection
   4) to play as an ADSL modem connecting Internet
   5) to be a router managing the how-to connect to other devices
รูทราบจากนักเรียนหลายคนที่เรียนวิชาคอมพิวเตอร์กับครูว่า ที่บ้านของพวกเขามีการเชื่อมต่ออินเทอร์เน็ตผ่านผู้ให้บริการอินเทอร์เน็ต ทศท.(TOT) ซึ่งที่บ้านครูก็ใช้บริการของ ทศท.เหมือนกัน  แล้วระบบเครือข่ายที่บ้านเราจะเป็นแบบไหน?  อุปกรณ์หลักก็คือ โมเด็ม-เราเตอร์ (modem-router) ซึ่งอุปกรณ์นี้จะทำหน้าที่หลายบทบาทด้วยกัน คือ
   1) จำลองตัวเองเป็น server computer
   2) เป็น hub/switch ของการเชื่อมต่อแบบใช้สาย
   3) เป็น access point ทำหน้าที่ส่งแพ็คเก็ตส์ในระบบเครือข่ายไร้สาย
   4) เป็น ADSL modem เชื่อมต่อ Internet
   5) เป็น router บริหารจัดการเชื่อมต่อกับอุปกรณ์/คอมพิวเตอร์อื่นในเครือข่าย

Be sure, most of our home network is hybrid. One is wired while another is  wireless. Although a home network is not complex, but its system is so smart and its Internet connection is so clever with the ADSL technology. The superstar is a "modem-router", the genius device.
โฮมเน็ตเวิร์กที่บ้านส่วนใหญ่เป็นไฮบริด คือ ผสมกันทั้งแบบมีสาย (wired) และแบบไร้สาย (wireless)  แม้ว่าระบบโฮมเน็ตเวิร์กอาจจะดูไม่ซับซ้อนอะไรมาก  แต่ระบบเครือข่ายนี้ก็ไม่ไช่ธรรมดา การเชื่อมต่ออินเทอร์เน็ตก็ทำได้ดีด้วยเทคโนโลยี ADSL และแน่นอนว่า อุปกรณ์อัจฉริยะของระบบก็คือ "modem-router" นั่นเอง 

The composition of any home network 
(e.g. home internet connection of students)

     UTP :  Unshielded Twisted Pair cables are so common in any computer rooms  e.g. classroom102 of our school. The UTP cable is caped with a connector which is called RJ-45. The RJ-45 connector will be inserted into the LAN port of any Ethernet card/router/switch/hub. (The RJ-11 connector of the phone line is smaller than RJ-45).
สายเคเบิลแบบยูทีพี (UTP) หรือสายคู่บิดเกลียวไม่หุ้มฉนวน (Unshielded Twisted Pair cables) จะพบได้ทั่วๆ ไปในห้องคอมพิวเตอร์ อาทิ ห้องเรียนคอมพ์102 ในโรงเรียนของเรา  UTP จะถูกเข้าหัวด้วยหัวต่อ หรือคอนเน็กเตอร์ (Connector) ที่เรียกว่า RJ-45  ซึ่งหัวต่อนี้จะถูกเสียบไว้ที่ช่องเสียสายแลน หรือแลนพอร์ต (LAN port)   เราเตอร์ สวิตช์ หรือฮับ  (ขณะที่หัวต่อ RJ-11 ของสายสัญญาณโทรศัพท์จะมีลักษณะเหมือนกัน แต่มีขนาดเล็กกว่า) 

 What is ADSL? (www.wikipedia.org) : It is "Asymmetric Digital Subscriber Line" technology. This is a data communications technology that enables faster data transmission over copper telephone lines than a conventional modem can provide. (Modem is a device that manages the joint communication between the phone and the computer.)
ADSL คืออะไร? (www.wikipedia.org สารนุกรมเสรี) อธิบายว่า "Asymmetric Digital Subscriber Line" technology.
  เป็นเทคโนโลยีโทรคมนาคมที่ทำให้การส่งข้อมูลผ่านสายโทรศัพท์ที่ปกติจะเป็นสายทองแดงนั้น ทำได้ดีมีประสิทธิภาพมากกว่า การใช้โมเด็มธรรมดา (Modem เป็นอุปกรณ์ที่จะทำหน้าที่บริหารจัดการสัญญาณจากโทรศัพท์และสัญญาณจาคอมพิวเตอร์ให้มาทำงานร่วมกันได้)


Another one I would like to refer to is "protocol". What is it? protocol is a system of digital message formats and rules for exchanging those messages in or between computing systems and in telecommunications. And in our network we use the TCP/IP (comes from "Transmission Control Protocol and Internet Protocol). Now Thailand uses IPv4 protocol, but Thai government by Prime Minister Yingluck  Shinawatra is going to change the Internet protocol of the country with another version, IPv6 protocol, which has more capacity and efficiency of transmission.  
 ละมีอีกเรื่องที่ครูอยากจะพูดถึงก็คือ "โปรโตคอล" มันคืออะไร?  ถ้่าจะว่าไปนะ คำๆ นี้ มันเป็นภาษาที่ใช้ในวงการฑูตเขา คือกรณีที่ต้องมีการติดต่อสื่อสารกันระหว่างพวกฑูตของประเทศต่างๆ เขาก็จะต้องมีวิธีการ มาตรฐาน ระบบระเบียบต่างๆ ที่เข้าใจตรงกัน และเขาเรียกว่า protocol ทางวงการคอมพิวเตอร์ก็ไปขอยืมคำศัพท์ของเขามาใช้บ้าง  โปรโตคอลของเครือข่ายคอมพิวเตอร์(www.wikipedia.org) ก็คือ ระบบของรูปแบบข่าว สารเชิงดิจิตอลและกติกา ของการแลกเปลี่ยนกันระหว่างระบบคอมพิวเตอร์และโทรคมนาคม  ซึ่งทุกวันนี้ โปรโตคอลที่เราใช้ในเครือข่ายนั้น คือ ทีซีพี/ไอพี (โปรโตคอลควบคุมการส่งข้อมูล และอินเทอร์เน็ตโปรโตคอล)  และ ตอน นี้รัฐบาลไทย ภายใต้การนำของ ฯพณฯ ยิ่งลักษณ์ ชินวัตร  ก็กำลังปรับเปลี่ยนอินเทอร์เน็ตโปรโตคอลของประเทศเรา ที่ขณะนี้เป็นเวอร์ชัน 4 ให้เป็นเวอร์ชั่น 6  เพื่อรองรับปริมาณของเครือข่าย และประสิทธิภาพที่ขยายเพิ่มขึ้น 
 
Because each computer of the network has its own unique "IP-address", what/how is it? As I have just told you (see, first paragraph) that the modem-router simulates itself like a server computer, sure its IPaddress must be static, e.g. (IPv4) 192.168.2.1, 192.168.1.1, 192.168.0.1 etc. , on the other hand it lets the other connected computer the dynamic/automatic IPaddress. Yes, the modem-router of the home network is the gateway to Internet.

พราะเครื่องคอมพิวเตอร์แต่ฃะเครื่องในระบบเครือข่าย ต่างก็มีรหัสไอพี (IP-address) เฉพาะตัวไม่ซ้ำกัน  เหตุไฉน/อย่างไร?  ก็ตามที่ึรูได้กล่าวไปแล้วว่า  modem-router จะจำลองตัวมันเองเป็นเสมือน server computer  แน่นอนว่า ตัวมันเองก็จะต้องมีรหัสไอพีที่แน่นอนตายตัว อาทิ (ถ้าดูตาม IPv4)  192.168.2.1, 192.168.1.1, 192.168.0.1 ประมาณนี้  ในอีกทางหนึ่งมันก็ยอมให้เครื่องอื่นๆ ที่เป็นลูกข่าย/ลูกน้อง ที่มาเชื่อม่อเครือข่ายกับมันมีรหัสไอพีแบบอัตโนมัติ  ส่วนจะเป็นอะไรนั้นก็แล้วแต่มันจะจัดให้  แต่ก็มักจะเป็นรหัสที่ต่อเนื่องกับตัวมันนั่นแหละ  อาทิ 192.168.2.3 เป็นต้น เพราะตัวมันเองเป็นเครื่องเกตเวย์
Teacher's home network PC/Modem-router IPaddress Configuration
use the "IPCONFIG" command to see what/how my home PC/modem-router IPaddress configuration by typing the command at the command line of Windows and what I knows are the followings 

... 192.168.2.1  is the IPaddress (IPv4) of my modem-router, Belkin brand.
... 192.168.2.3  is the IPaddress (IPv4) of my PC, configured by the modem-rounter 

รูได้ใช้คำสั่ง ณ คอมมานด์ไลน์ของ Windows7 ว่า  IPCONFIG  เพื่อต้องการทราบว่า  รหัสไอพีของเครื่องคอมพิวเตอร์ และโมเด็ม-เราเตอร์ที่บ้่านมีค่าอะไร ก็พบว่า
... 192.168.2.1  เป็นรหัส IPaddress (IPv4) ของ modem-router, ยี่ห้อ Belkin 
... 192.168.2.3  เป็นรหัส IPaddress (IPv4) ของเครื่องคอมพิวเตอร์ ที่จัดให้/กำหนดให้โดย modem-rounter 

Yes, each other computer in the network can never be configured with a static IPaddress because the modem-router as the server PC/the gateway PC cannot share Internet connection anyway.
ใช่เลย คอมพิวเตอร์เครื่องอื่นๆ ในระบบโฮมเน็ตเวิร์ก มิอาจมีค่ารหัสไอพีแบบคงตัวได้  เพราะมันจะต้องถูกตั้งเป็นอัตโนมัติไว้ให้ modem-router ในฐานะเป็น server PC/the gateway PC เป็นตัวกำหนด  ถ้าไม่เช่นนั้น  มันจะไม่สามารถแชร์การเชื่อมต่ออินเทอร์เน็ตมาให้ได้นั่นเอง

Internet Connection Problems ปัญหาการเชื่อมต่ออินเทอร์เน็ต


               by  Teacher  Phaitoon  Yaemprasuan   :   occupatech@gmail.com
                                                            http://picta55.blogspot.com


Sometimes the problems caused by unintentional human errors
บางทีนะ  ปัญหาก็เกิดจากความผิดพลาดที่ไม่เจตนาของคนเราเองนี่แหละ

Sometimes Internet connection problem can be our frustration. Rather than pressing F5-key and  trying to reload the website when we experience a problem, here are some ways we can troubleshoot the problem and identify the cause.
 างครั้งปัญหาการเชื่อมต่ออินเทอร์เน็ตอาจกลายเป็นเรื่องความคับข้องใจเราได้เหมือนกัน  การกดแป้น F5 และการโหลดเว็บไซต์ใหม่ ก็อาจจะไม่เพียงพอ  แต่ถ้าเราพอจะมีประสบการณ์ในการแก้ปัญหาอยู่บ้าง ปัญหานี้ก็อาจจะคลี่คลายลงได้

Ensure we check the physical connections before getting too involved with troubleshooting. Anyone could have accidentally kicked the router or modem’s power cable or pulled an Ethernet cable out of a socket, causing the problem.
ก่อนอื่น เราต้องแน่ใจก่อนนะว่า กายภาพของการเชื่อมต่อ (the physical connections) ได้แก่ อุปกรณ์ สายสัญญาณ จุดเชื่อมต่อต่างๆ จักต้องอยู่ในสภาพปกติ ไม่มีใครไปสะดุดสายจนหลุด หรือดึงสายต่างๆ ออก

#    #     #  

Ping


Ping  (wikipedia.org) is a computer network administration utility used to test the reach-ability of a host on an Internet Protocol (IP) network and to measure the round-trip time for messages sent from the originating host to a destination computer.
ping เป็นคำสั่งที่ใช้บริหารจัดการ (administration utility) ระบบเครือข่ายคอมพิวเตอร์ ใช้เพื่อตรวจสอบการเข้าถึงเครื่องคอมพิวเตอร์ที่มีตัวตนจริงหรือโฮสต์ (host) ของเครือข่ายที่ใช้อินเทอร์เน็ตโปรโตคอล  เพื่อจะวัดเวลาของการสื่อสารไป-กลับ ระหว่างคอมพิวเตอร์ต้นทางและปลายทาง

The name comes from active sonar terminology which sends a pulse of sound and listens for the echo to detect objects underwater. 
ชื่อนี้มีที่มาจากโซนาร์ sonar terminology ที่เรือดำน้ำใช้ส่งให้ไปกระทบวัตถุใต้น้ำ แล้วสะท้อนกลับมานั่นเอง

One of the first things to try when our connection doesn’t seem to be working properly is the ping command. Open a Command Prompt window from your "Start button" using the "cmd" command  and type a command like ping google.com.  
 สิ่งแรกที่เราควรทำ เมื่อการเชื่อมต่ออินเทอร์เน็ตของเราไม่เวิร์ก ก็คือ การใช้คำสั่ง ping โดยอาจจะเปิดหน้าต่าง command prompt ด้วยคำสั่ง cmd ณ Start Button แล้วพิมพ์คำสั่ง เช่น ping google.com .  


This command sends several packets to the address you specify. 
We can see that everything is working fine.
There’s 0% packet loss and the time each packet takes is fairly low.  

คำสั่ง ping จะส่ง packets (ข้อมูลในหน่วยวินาที) ไปยังเครื่องที่เป็นโฮสต์ปลายทาง 
จากภาพ จะเห็นว่า คำสั่งทำงานได้ดี  ไม่มีการสูญเสีย packet เลย  คือ ส่งไป 4 ได้คืน 4
และใช้เวลาน้อย 13-25 (เฉลี่ย 18) มิลลิวินาที 


  #    #     #

Modem & Router Issues

 Sometimes our modems or routers can cause the problem of Internet connection. A modem is a device that communicates with your Internet service provider (ISP), e.g. TOT, while the router shares the connection among all the computers and other networked devices in our home network. In my case (and also other students' cases ) , the modem and the router of mine is the same device, so it is called the "modem-router".
 างครั้ง Modem หรือ Router ก็อาจจะเป็นปัญหาการเชื่อมต่ออินเทอร์เน็ตของเราก็ได้  
Modem เป็นเครื่องมือในการสื่อสารกับผู้ให้บริการอินเทอร์เน็ต (Internet service provider : ISP)  อาทิ  TOT   สำหรับ Router เป็นอุปกรณ์ที่ทำหน้าที่แชร์การเชื่อมต่อระหว่างคอมพิวเตอร์และอุปกรณ์ต่างๆ ในระบบโฮมเน็ตเวิร์ก  กรณีของบ้านครูเอง (และบ้านนักเรียนกาญจนาฯ หลายคน) อุปกรณ์สองอย่างนี้จะเป็นตัวเดียวกัน มันเลยถูกเรียกว่า "modem-router"

 Let's take a look at the modem-router. If green lights are flashing on it, that’s normal and indicates network traffic. If we see a steady, blinking orange light, that generally indicates the problem. 

องดูสิว่า  modem-router ของบ้านเรา  มันมีไฟสัญญาณเป็นสีเขียวนิ่งๆ หรือเปล่า? ถ้าใช่ ก็แสดงว่า เครือข่ายโฮมเน็ตเวิร์กบ้านเราทำงานเป็นปกติดีไม่มีปัญหา  แต่ถ้าเราเห็นไฟสัญญาณเป็นสีอำพันกระพริบๆ ก็หมายความว่า โฮมเน็ตเวิร์กมีปัญหาแล้ว


All Green Lights Mean Normality
สัญญาณไฟเขียวตลอดแบบนี้ แสดงว่า ทุกอย่างปกติดี


If the lights indicate that either devices are experiencing a problem, try unplugging them and plugging them back in. This is just like restarting our computer. If we still experience problems, we may need to perform a factory reset on your router (to see its manual)
 ากไฟสัญญาณของ modem-router แสดงว่า มีปัญหา  ขอให้เราลองดึงปลั๊กไฟของมันออก แล้วเสียบกลับเข้าไปใหม่  ทำแบบนี้ก็ทำนองเดียวกับการที่เรา Restart คอมพิวเตอร์ใหม่นั่นแหละ  หากทำแล้วยังมีปัญหาอยู่  เราก็อาจจะต้องทำการรีเซ็ตอุปกรณ์นี้ใหม่ (ดูคู่มือก่อน) ให้กลับไปเป็นค่าที่ตั้งมาจากโรงงาน


#    #     #

Our Classroom102

What is about the problem when we are in the classroom? Because the IPaddress conflict can be occurred  anytime, so any computer in the classroom102 can be kicked off easily by the gateway computer of the Media Center which we have to lean on.
ปัญหาการเชื่อมต่ออินเทอร์เน็ตในห้องเรียนเป็นแบบไหน? ก็เพราะปัญหารหัสไอพีของเครื่องขัดแย้งกัน (IPaddress conflict) สามารถเกิดขึ้นได้ตลอดเวลา  ดังนั้นคอมพิวเตอร์ในห้องเรียน102 ก็มีสิทธิ์จะถูกดีดออกนอกระบบได้ไม่ยากจากเครื่องเกตเวย์ของศูนย์สื่อที่เราต้องพึ่งพาในการเชื่อมต่ออินเทอร์เน็ตนั่นเอง
  
Yes, we cannot connect to the Net directly but always request Internet sharing with the server computer of School Media Center through the local area network.
ใช่เลย  เราไม่ และไม่อาจเชื่อมต่ออินเทอร์เน็ตโดยตรงได้ นอกจากต้องพึ่งพาเครื่องคอมพิวเตอร์แม่ข่ายของศูนย์สื่อของโรงเรียน  (the server computer of School Media Center)  ผ่านระบบเครือข่ายแลน


There are variety kinds of computer in the classroom102, both old and new, big-name and no-name, useable and unusable 
คอมพิวเตอร์ในห้องเรียน 102 มีหลายจำพวก ทั้งเก่าทั้งใหม่  ทั้งมียี่ห้อและไม่มียี่ห้อ  ที่ใช้ได้ก็มี ที่ใช้ไม่ได้ก็มี


Because any student can log on any computer in our classroom with the administrative account, so he has the full permissions to change/config anything about the network, then any problem can be occurred anytime.
เป็นเพราะนักเรียนสามารถจะล็อกออนเข้าใช้งานคอมพิวเตอร์ด้วยแอ็คเคาท์ของผู้ดูและระบบของเครื่องคอมพิวเตอร์นั้นๆ (the administrative account)  ก็เลยมีสิทธิ์เต็มร้อยที่จะเข้าไปปรับค่าต่างๆ ของระบบเครือข่ายของเครื่อง  ปัญหาก็อาจจะเกิดขึ้นได้ตลอด
เวลา

Folder and Printer Sharing การแชร์โฟลเดอร์/เครื่องพิมพ์

                      by  Teacher   Phaitoon  Yaemprasuan
                             occupatech@gmail.com; picta55@gmail.com
                             http://picta55.blogspot.com

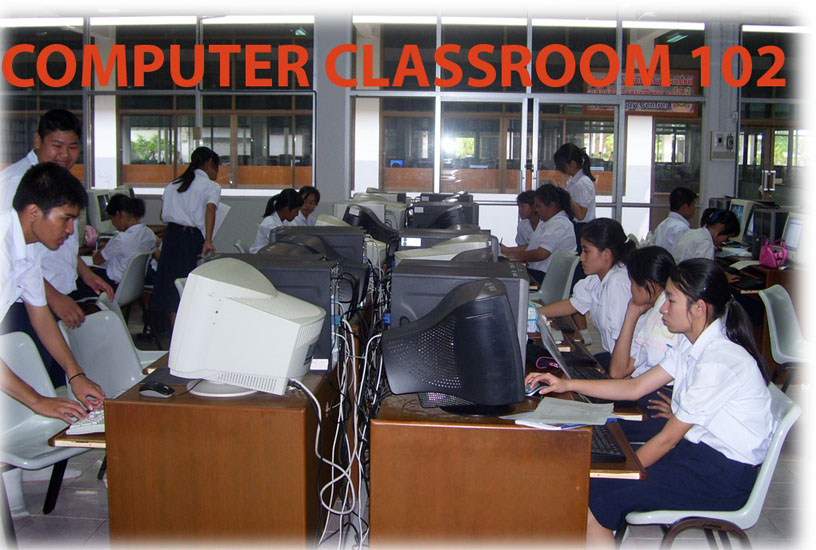
The Atmosphere of My 2003 Computer Class at 4th Floor of Building1.
They were energetic and very nice schoolkids I have ever experienced.

บรรยากาศห้องเรียนคอมพิวเตอร์  2546 สมัยยังอยู่ชั้น 4  อาคาร 1 
พวกเขาเป็นเด็กนักเรียนที่ขยันขันแข็ง ตั้งใจเรียน และเป็นเด็กดีมากที่สุดรุ่นหนึ่งเท่าที่ครูเคยเจอ
All of us use Windows7 as the operating software, and our computers are connected together within the workgroup of the LAN (local area network). So we should gain the benefit of its sharing capability. Here we go!
ตอนนี้พวกเราล้วนแล้วแต่ใช้ Windows7 เป็นซอฟต์แวร์ระบบปฏิบัติการ (ในห้องเรียน และที่บ้านด้วย)  และเครื่องของพวกเราก็เชื่อมต่อกันเป็นเวิร์กกรุ๊ปในระบบแลน  ดังนั้นเราก็น่าจะใช้ความสามารถในการแชร์ทรัพยากรระหว่างกันได้  ลองดูกัน

1. FOLDER SHARING
        การแชร์โฟลเดอร์

Be sure we have to specify what folder that we want to share?  
ต้องระบุโฟลเดอร์ที่ต้องการแชร์


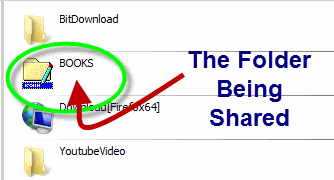
"BOOKS" is the folder of us to be shared.
ฟลเดอร์ "BOOKS" คือโฟลเดอร์ที่เราอยากแชร์

 Make a right clicking with the folder, the dialogue box appears. Select the "Sharing" tab and the "Advanced Sharing" button
คลิกขวาที่โฟลเดอร์  กรอบโต้ตอบจะปรากฏขึ้น  เราก็เลือกแท็บ 
"Sharing" และปุ่ม 
"Advanced Sharing"


Now the folder has never been shared yet (Not Shared)
ตอนนี้โฟลเดอร์นี้มีสถานภาพไม่ได้ถูกแชร์ไว้

 Properties window of the folder appears and we should select to share it with others. Now we can see the maximum number of users to simultaneously enter to the folder is 20. Then we can click on the "Permission" button.
จะปรากฏหน้าต่างพรอพเพอร์ตีส์ (คุณสมบัติ) ของโฟลเดอร์นี้ขึ้นมา  และเราก็ต้องเลือกว่าจะแชร์กัน  และจะเห็นว่า เพื่อนๆ จะเชื่อมต่อเข้ามาใช้โฟลเดอร์ของเราพร้อมกันได้เต็มที่ 20 เครื่อง แค่นั้น  ต่อมาก็เลือกคลิกปุ่ม "Permission"

Tick the check-box, and we can change the share name or ignore it.
ติ๊กเลือกว่าจะแชร์  จะเปลี่ยน/หรือไม่เปลี่ยนชื่อที่จะแชร์ก็ได้

After clicking on the permission button, the Permissions window shows up, you can add any user e.g. "student" and you can change the permission type of the user.
หลังจากคลิกปุ่ม permission  จะมีหน้าต่างโผล่มาให้เราปรับเปลี่ยนตามความต้องการ

We can add user/ specify his permission level.
เราสามารถเพิ่มยูสเซอร์ / ระบุระดับการอนุญาตใช้งานโฟลเดอร์ของเราแก่เขา

Finally click on the "Apply" button, the folder now has been shared. 
เมื่อเราคลิกปุ่ม "Apply" โฟลเดอร์ของเราก็ได้รับการแบ่งปันให้ใช้ร่วมกันได้ในเครือข่ายแล้ว

Well, our folder has been shared.
Folder ของเราได้รับการแชร์กันใช้เรียบร้อยแล้ว

Sample Special
ตัวอย่าง


This is from my computer (Its hostname is "ALPHA00".), when I click on the "Network" (at the left pane of Windows7 " computer explorer" ),  some computer hostnames appears.  Yes, I want to randomly select any hostname. If the target of mine is "KACHATUCH", well, I would make a double-click on it.
นี่เป็นคอมพิวเตอร์ของครูที่ห้องพักครู (โฮสต์เนมว่า ALPHA00)  เมื่อครูคลิกเลือก Network (อยู่ตรงแถบซ้ายของหน้าต่าง Computer explorer ของ Windows7 ก็จะปรากฏโฮสต์เนมต่างๆ ในเครือข่าย  แน่นอนว่า ครูก็คงต้องสุ่มเลือกเข้าไปใช้เครื่องใดสักเครื่อง  ที่ครูเล็งไว้ก็คือเครื่องที่มีโฮสต์เนมว่า Kachatuch

My Target Hostname is "KACHATUCH"
เครื่องที่ครูเล็งไว้คือ โฮสต์เนมที่ชื่อว่า Kachatuch

The shared folders of the hostname will be appeared. Then we can do a random selection and we can find any other subfolders that we can select to use.
ตอนนี้ก็จะเห็นโฟลเดอร์ที่โฮสต์เนม Kachatuch  เราก็คงต้องสุ่มเลือกโฟลเดอร์  แล้วเราก็จะเห็นโฟลเดอร์ย่อยๆ ที่เราสามารถจะเลือกเข้าไปใช้ได้ 

The Shared Folders of "Kachatuch" appears, any folder could be selected.
  If any shared folder had been selected its subfolders would be revealed. 

แชร์โฟลเดอร์ของโฮสต์เนม "Kachatuch" ก็จะปรากฏขึ้นมาให้เห็น เราสามารถเลือกโฟลเดอร์ไดก็ได้
ถ้าแชร์โฟลเดอร์ใดถูกเลือกเข้าใช้ โฟลเดอร์ย่อยๆ ก็จะได้รับการเปิดตัวออกมาให้เห็นฝเลือกใช้ได้


 2. PRINTER SHARING
        การแชร์พรินเตอร์


 Click the "Start button" of Windows7 desktop, the pop-up menu appears, then select "Devices and Printers", the target printer of us will be appeared.
จากปุ่ม Start ของ Windows7 เราก็เลือก "Devices and Printers"  ก็จะเจอพรินเตอร์ที่เราอยากจะแชร์กันใช้

Select the printer

 Make a right click on the printer icon, the select menu will show up, then select "Printers properties" option.  Then we can operate sharing easily.
คลิกขวาที่รูปพรินเตอร์ จะมีป็อปอัพเมนูโผล่ขึ้นมา ให้เราเลือก "Printers properties" ต่อจากนี้ เราก็คงจะปฏิบัติการแชร์พรินเตอร์ได้ไม่ยากแล้ว...

Select : Printer Properties

Click on the "Sharing tab", and we can rename the sharing printer.
เลือกแท็บ Sharing และสามารถเปลี่ยนชื่อพรินเตอร์ที่กำลังจะแชร์ได้ด้วย

Select the Sharing Tab
   
Select to share